If you and your family love basketball, you may dream of having your own basketball hoop in your yard. Basketball hoops come in many different types but install in-ground basketball hoop systems offer the most durability and professional play.
Find out how to install a basketball hoop and why professional installation is a good idea when shopping for a basketball hoop.
Get the information you need to know before you buy your next basketball hoop. We’ve compiled a list of the best in-ground basketball hoops on the market.
How to Install a Basketball Hoop In-Ground?
It’s time for the exciting part—you’ve done your research and found the right basketball hoop for your family! It can be a lot of work to install a basketball hoop, but here are the steps you need to follow.
It won’t take long for you to set up your own basketball hoop and get the family shooting hoops! The following is a step-by-step guide to installing a basketball hoop:
Step 1. Choose Your Location and Call Before You Dig
Choosing the right location is one of the most important steps in the basketball hoop installation process, as described in the section on things to consider.
It is imperative that you Call Before You Dig (dial 811) to make sure there are no utility lines under the ground where you plan to install In-Ground basketball hoop. More information can be obtained from your Superior Play System representative.
Before installing your in-ground basketball hoop, be sure to check with your neighborhood ordinances or homeowner’s association. Before you start digging, make sure you read all the instructions and check any manufacturer recommendations.
Step 2. Dig a Hole
For the basketball hoop pole, you’ll need to dig a hole. Make sure you check with your manufacturer and your particular model to find out how big the hole should be and how to dig it.
An auger or other digging equipment can be used to dig by hand or with an auger. For specific instructions, refer to the owner’s manual.
Step 3. Pour the Concrete
Using concrete, you will secure the basketball hoop pole in the ground once you have dug the hole. A single pole may be used in some models so that the concrete can simply be poured around it.
The pole should be held level while the concrete is poured around it by someone (or two). Most commonly, rebar-mounted anchors are set into concrete once it’s been poured. If you’re pouring concrete either way, make sure that you regularly agitate it with a shovel to remove any air pockets.
Make sure everything is level before smoothing out the concrete with a trowel. If there is any excess, wipe it off with a damp towel or sponge. Now that the cement has been placed, it must be allowed to dry for at least 24 to 48 hours.
Be sure to check the cement constantly for the first few hours to ensure that the pole has not shifted. Keep checking the pole until the cement has hardened if necessary. You should wait until the cement has completely dried and hardened before continuing the assembly.
Step 4. Raise the Pole
The backboard can be skipped if your basketball hoop setup consists of a pole embedded in cement. The pole should be assembled and raised if your setup includes a mounting anchor.
Please follow the instructions for your specific model, as they may differ. The lift mechanism and support arms of an adjustable-height basketball hoop should be assembled according to the directions.
It may require a few people to lift the post into place because it is likely to be very heavy. Make sure your team takes any necessary safety precautions and lifts up the pole so that it aligns with the anchor piece in the cement.
Secure the post into place by using the bolts. Make sure it’s level. To ensure the pole is completely level, leveling nuts should also be included in the setup.
Step 5. Attach the Backboard
Many upscale basketball hoops require you to attach the backboard after the pole is raised, unlike some basketball hoops that attach it before the pole is raised.
It may take several people to lift and install the backboard since it is generally very heavy. Take precautions for safe lifting and have a few extra helpers around.
Lift the backboard up to the support arms while another person secures it to the support mount with several of your helpers. There may be other cross braces or support arms to attach at this point depending on the model. Make sure you secure all of the right parts according to the directions.
Step 6. Install the Rim and Net
The basketball rim and net should be added after the backboard is fully attached. The rim will be bolted to the backboard in place.
Breakaway rims may require additional assembly if you’ve selected them. Once the rim is attached, you can loop the net around each hook on the rim to complete the installation.
Step 7. Finishing Touches
You are almost ready to play basketball with your basketball hoop! There are a few more steps to complete and customize your setup, some of which are optional. You can attach extra padding around the corners of the backboard and around the pole on some upscale models.
Players can benefit from these optional touches, which prevent bumps and bruises when accidentally bumping into the basketball hoop, as well as other injuries.
Your family can now adjust the height of the basketball hoop if you have an adjustable-height basketball hoop. Before marking the height on the pole or using the provided height stickers, you may need to place it at the regulation 10 feet first.
Make sure the rim height is accurate by measuring it. With the height stickers, it is easy to see where the adjustment mechanism needs to be adjusted at a glance.
Now is the time to install any additional accessories, such as court lighting. Follow the turret’s instructions for any accessories to get them installed properly. Depending on the size of the area where your hoop will be installed, you may want to paint court lines on the pavement.
If you decide to paint lines, pressure washes the area first to ensure the paint adheres to a clean surface. Mark off with painter’s tape where the lines should be.
Your lines should be painted in and the tape should be removed. Now that you have your own basketball court, you are truly ready to play! Organize your family and get ready to play!
Why Should You Have a Professional Install Your Basketball Hoop?
You’re not alone if following these basketball hoop installation tips and steps makes your head spin. It can be a bit challenging to install In-Ground basketball hoop yourself, even in today’s DIY culture.
Why not let the professionals install your system if you think installing it yourself is just a little too much? It will save you a lot of time and trouble if you hire professionals to do the installation.
Take into account how long it will take you to complete the installation process. It still takes at least two days to complete the process even if you follow every step exactly. It can take longer than expected to conduct research and prepare.
There are also a lot of tools and specialized equipment needed to install an in-ground basketball hoop. It can be difficult to dig a hole large enough for the basketball hoop post by hand, so you may need to rent equipment if you don’t have an auger or backhoe.
The purpose of having a basketball hoop in your yard should be to have fun, not to frustrate you. It’s so much easier to get to the fun part faster when you have a professional install your hoops.
Superior Play Systems® offers some of the best basketball hoops on the market, as well as white-glove installation services. A professional can do the job faster and easier than you could on your own, and you know it will be done right the first time.
Buying Guide
When buying a basketball hoop for your home, there are many factors to consider, including where it will be installed and what kind you will need.
If you’re going to buy and Install In-Ground basketball hoop on your property, then you’ll want to make sure you get the right kind for your family. If you are considering buying a basketball hoop, here are some factors you should consider:

1. Choosing a Seller
When purchasing an in-ground basketball hoop, it’s important to choose the right seller. Post-purchase support, such as installation and customer service, is what makes the best sellers.
In-ground systems from PROformance Hoops® are available from Superior Play Systems®, the safest and most trusted name in play. You can count on us to provide seamless installation when you purchase your basketball hoop from us.
2. Location
When choosing a location for your new basketball hoop, you should take several factors into account. A basketball hoop is often placed in a driveway, but make sure that the driveway is level, as playing basketball on an incline is much more difficult.
You may want to consider a dedicated area or even a full-size basketball court if you have a large backyard and a sufficient budget. The only thing you need is a patio or paved area – a basketball won’t bounce on grass.
To keep players safe, the hoop should not hang over the street. You should also check your local and neighborhood ordinances and homeowner’s association rules for any restrictions on basketball hoop installation or placement.
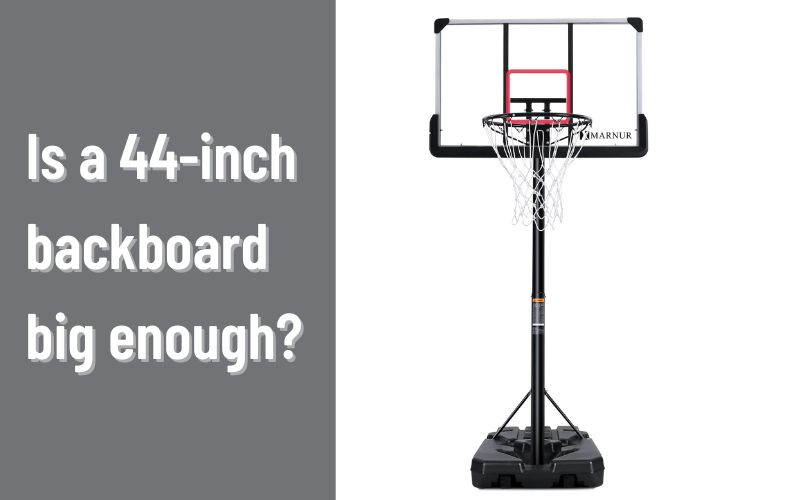
3. Backboard Size
Basketball hoops have a backboard that affects shot opportunities into the hoop, and generally, bigger is better. It is important to consider the size of your driveway or the location where you are installing the hoop.
If you have a small driveway, a large backboard may overwhelm the space. It is also important to consider the level of professionalism you desire.
For example, a 72-inch backboard would be appropriate if you have a child who is interested in becoming a professional basketball player. However, if the hoop is primarily used for family recreation, a larger backboard may not be necessary.
4. Height
Make sure that the height of your basketball hoop fits in with your chosen location. For a basketball hoop, the professional regulation height is 10 feet, but if you’re just playing for fun, you may want to choose an adjustable hoop or a shorter hoop.
It is also possible to find hoops that are adjustable in height so that they can grow along with your child. Be sure to have a minimum of 2.5 to 4 feet of overhang between the pole and the backboard.
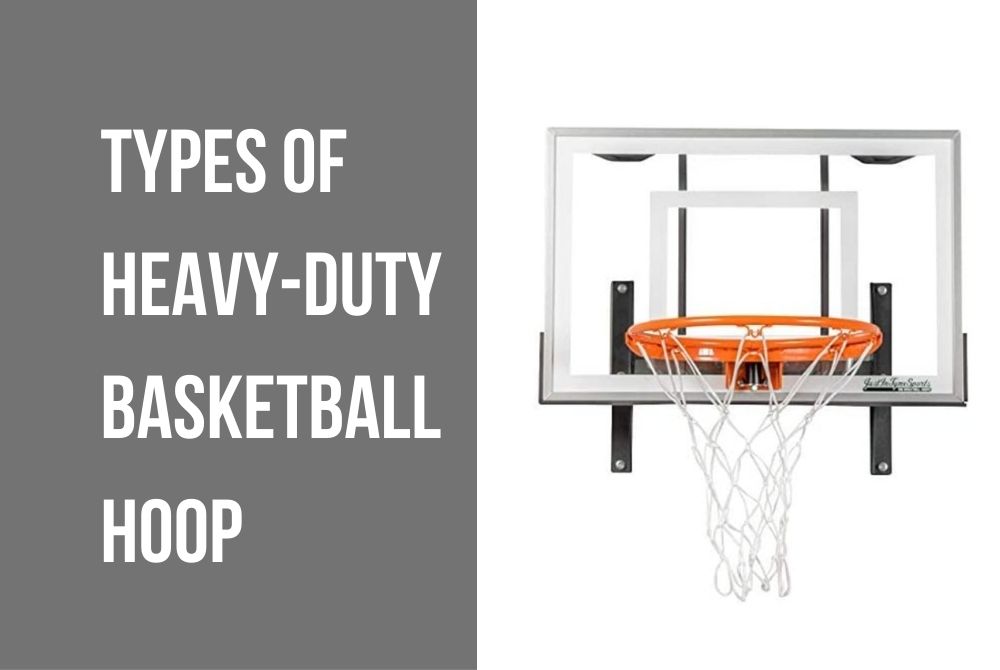
5. Type of Pole
It may seem simple to choose a pole for your basketball hoop, but there are actually many options to choose from.
Poles are available in round and square shapes, in sizes ranging from 4 to 6 inches, and in single or multi-piece configurations. Metal poles are usually painted or powder coated and made of metal.
6. Net and Rim
The rim on a standard basketball setup has an 18-inch diameter, and the net is attached by hooks. Static and breakaway rims are the two types of basketball hoops available for home use. For beginners or those looking for an economical option, a static rim is a great option, but not for dunking.
The best choice for your home setup is a breakaway rim if you anticipate some slam dunks. The rims are equipped with special springs that allow them to flex and absorb the force of the dunk. Your basketball setup will last longer, as well as be safer for the player.
The best basketball hoop for your family and your location will depend on the options you consider. It’s time to purchase a basketball hoop setup and install it in your backyard.
Conclusion:
Installing an in-ground basketball hoop is a complex project that requires a significant amount of time, effort, and attention to detail.
The process involves choosing a suitable location, marking the outline of the base and pole, digging a hole for the base, installing the base and pole, attaching the backboard and rim, and testing the hoop to ensure it is properly assembled and safe to use.
It is important to follow the manufacturer’s instructions and use proper safety precautions when installing an in-ground basketball hoop. If you are unsure about any part of the process, it is recommended to hire a professional to install the hoop for you.
Overall, the key to successfully installing an in-ground basketball hoop is thorough planning, careful execution, and a commitment to quality and safety.

![How to Stabilize Your Basketball Goal? [Feature in 2023]](https://bestportablehoops.com/wp-content/uploads/2022/07/How-to-Stabilize-Your-Basketball-Goal.jpg)
![How are lifetime Basketball Hoops? [Features and Suggestions]](https://bestportablehoops.com/wp-content/uploads/2022/07/How-are-lifetime-Basketball-Hoops-1.jpg)